PathWay E / EC
Ready to go?
Before you begin, remove the Dejero PathWay and the following accessories from the package:
- One AC power cord
- Mini-Circuits® tool
- Two mounting rails
- Two mounting brackets.
- Four M4 rail screws
- Six 6-32 chassis mount screws
- Adhesive plastic hanger for Mini-Circuits tool
Note: External antennas for cell connections are not included. For more information on recommended antennas, visit support.dejero.com to read the Dejero PathWay Antenna Reference Guide.
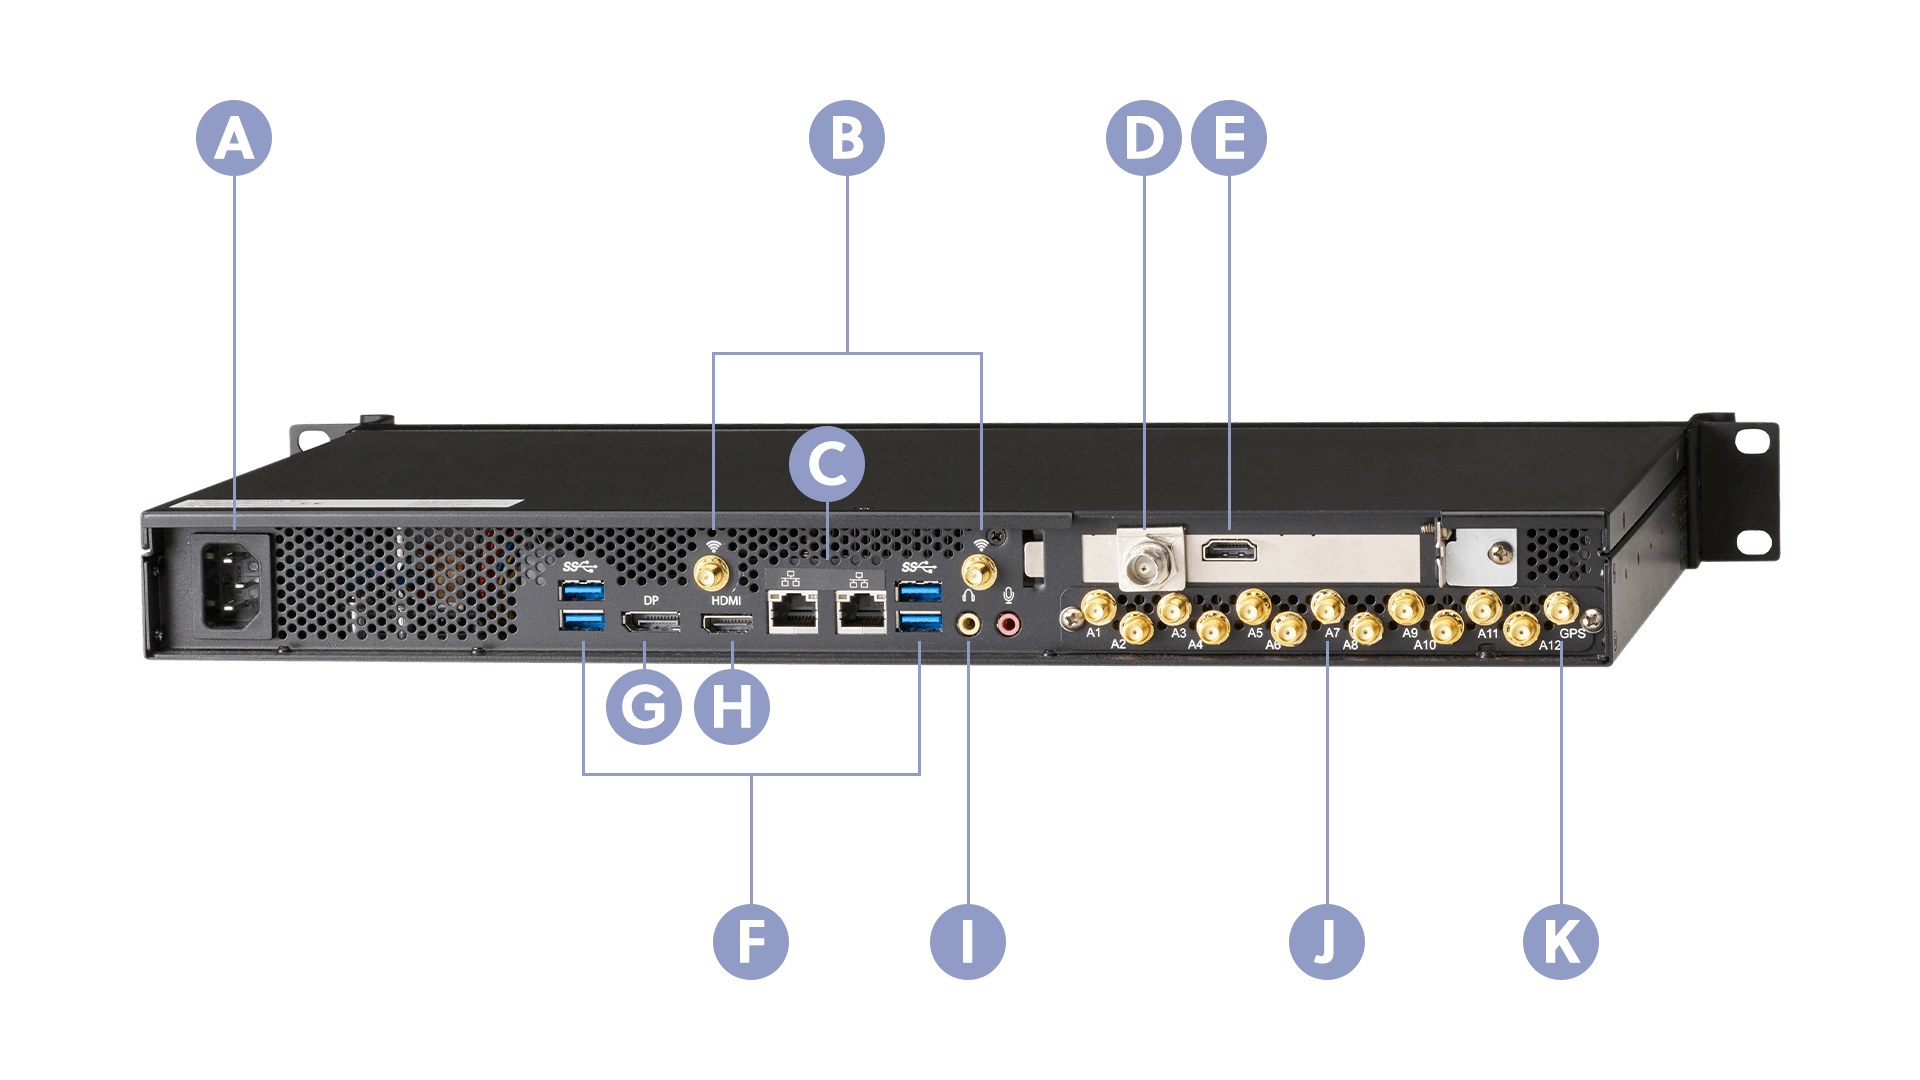
A. Power
B. Wi-Fi antenna connector
C. Ethernet ports
D. SDI input
E. HDMI input
F. USB ports
G. DP output
H. HDMI output
I. IFB input
J. Cellular antennas connectors (PathWay EC only)
K. GPS antenna connector (PathWay EC only)
Set up the PathWay
Dejero offers two variants of the PathWay:
- PathWay E: Ethernet-only connection with Wi-Fi® support.
- PathWay EC: Ethernet and cellular connections, with Wi-Fi support. The PathWay EC supports up to six cellular connections.
- Perform the following actions:
- For the PathWay EC, connect any cellular or GPS antennas to the appropriate antenna connectors on the back of the PathWay.
- Connect any Wi-Fi antennas to the appropriate antenna connectors.
- To use Ethernet connections to transmit over satellite, connect a cable to an Ethernet port.
- To use IFB, connect your ear piece to the IFB input.
- Connect your video input (with embedded audio) to the HDMI or SDI input on the PathWay.
- Make sure all cables are firmly connected.
- Connect the power cord to the back of the device.
- Plug the power cord into a grounded outlet.
Navigate the PathWay
When the PathWay is on, status and error messages appear on the front display screen. You can also use the screen to configure the PathWay.
When you power on the PathWay, it performs a diagnostic test and Ready appears on the first line of the screen when it is ready to use.
To configure the PathWay, use the dial beside the screen to navigate the menus.
- To scroll through the menus, turn the dial left and right.
- To scroll through the text, turn the dial left and right as necessary.
- To open a menu or make a selection, push the dial.
- To return to the top of the previous menu, select Back.
Configure Auto Start
Using Auto Start, you can configure the PathWay to start a live transmission automatically – without the need for operator interaction. When the PathWay is on, it will start streaming as soon as it detects video. You can also specify a delayed start for the live transmission.
- Perform one of the following actions:
- On the PathWay, use the dial to scroll through the menu options. Select Settings.
- If you use Remote Control with the PathWay, select the Menu > Settings.
- Select Operation.
- Select Auto Start.
- Set the delay setting to No delay, 1 minute, 2 minutes, 3 minutes, 4 minutes, or 5 minutes.
Note: For more information on configuring and managing the PathWay, visit support.dejero.com to read the Dejero PathWay User Guide.
Need help?
You can find more support information on the SupportHub at support.dejero.com. If you require additional help, please contact support at support@dejero.com.
Technical Support:
support@dejero.com
US & Canada (Toll Free): 1 866 808 3665, ext 2
International: +1 519 772 4824, ext 2