EnGo 3s
Ready to go?
Before you begin, remove the Dejero EnGo 3s and the following additional parts from the package:
- EnGo mobile transmitter
- Power adapter with country-specific cord
- EnGo backpack, which includes:
- A power cable that connects directly to a D-Tap port on a battery or the included V-Mount or Gold Mount battery plates
- A backpack cover for weather protection
- An HDMI cable
- Audio extension cables (3.5 mm and XLR) for IFB
- Audio extension cable (3.5 mm) for Intercom
- A Wired Remote
Note: Do not open the device or remove the antenna endcaps on either end of the EnGo – removing them voids the warranty. To service the EnGo, contact Dejero Support or your Dejero-authorized service partner.
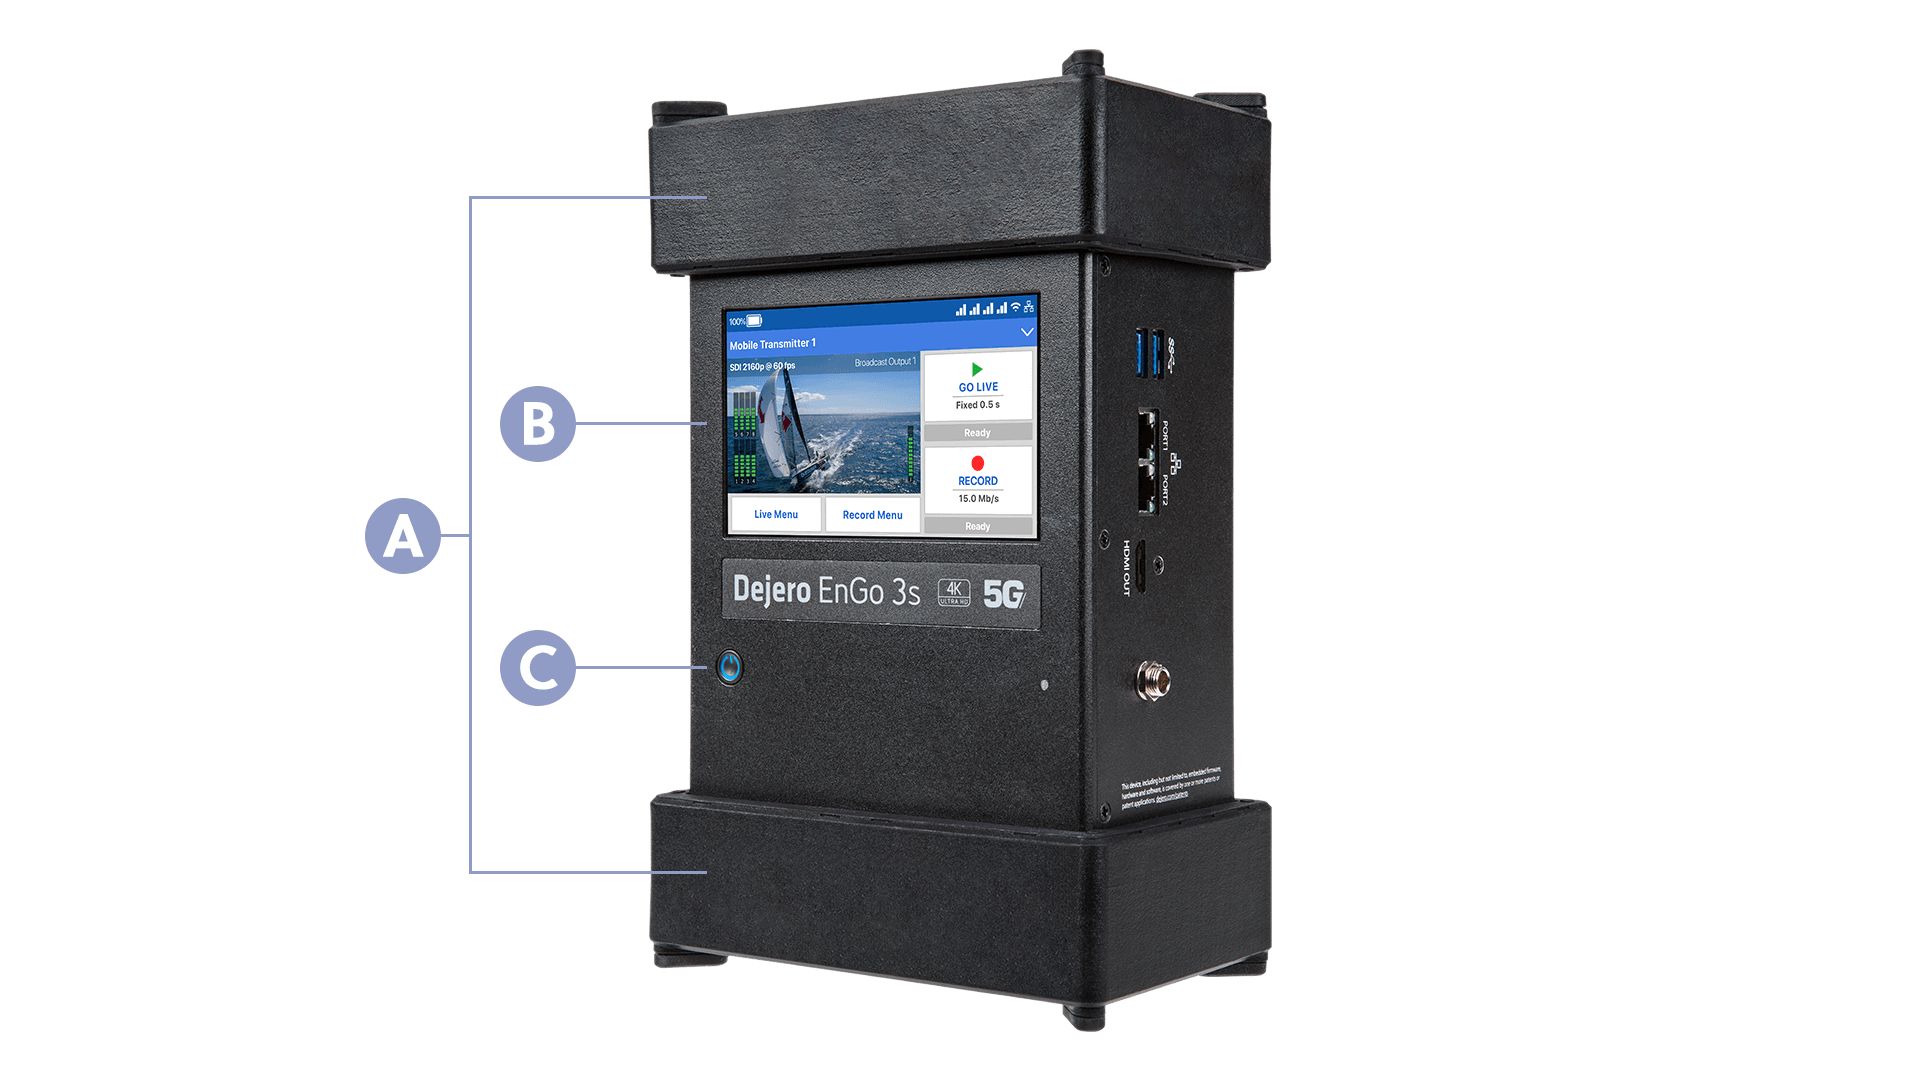
A. Antenna endcaps
B. Preview screen
C. Power button
Charge the EnGo using a power outlet
Note: Use only the power adapter that is included with the EnGo 3s. You cannot use the power adapter from an EnGo hardware version 265 or earlier to charge the EnGo 3s.
- Connect the one end of the power cord to its power adapter.
- Connect the power cord that is connected to the power adapter to the DC IN port on the side of the EnGo.
- Plug the other end of the power cord into a power outlet.
Charge the EnGo using an auxiliary battery
Use the included power cord to connect to a D-Tap port on an auxiliary battery or the V-Mount or Gold Mount battery plates to charge the EnGo.
- Connect the power cord to the DC IN port on the side of the EnGo.
- Perform one of the following actions:
- Connect the power cord directly to an auxiliary battery.
- Connect the power cord to the battery plate. Slide an auxiliary battery onto the battery plate.
Note: When you connect an auxiliary battery to the EnGo, the battery both powers and charges the EnGo (if the internal battery needs charging). Because it performs both functions, the battery level in the auxiliary battery drains faster.
Starting the EnGo
- On the front of the EnGo, press and hold the power button for approximately one second.
While the transmitter turns on and establishes a network connection, start-up messages appear on the Preview screen.
Connecting to the EnGo
You can use the connection ports on either side of the EnGo to connect video and audio, Ethernet, IFB, or Intercom.
Note: By default, both Ethernet ports on the EnGo 3s are configured as WAN ports. You can change the WAN/LAN configuration for each port using Dejero Control.
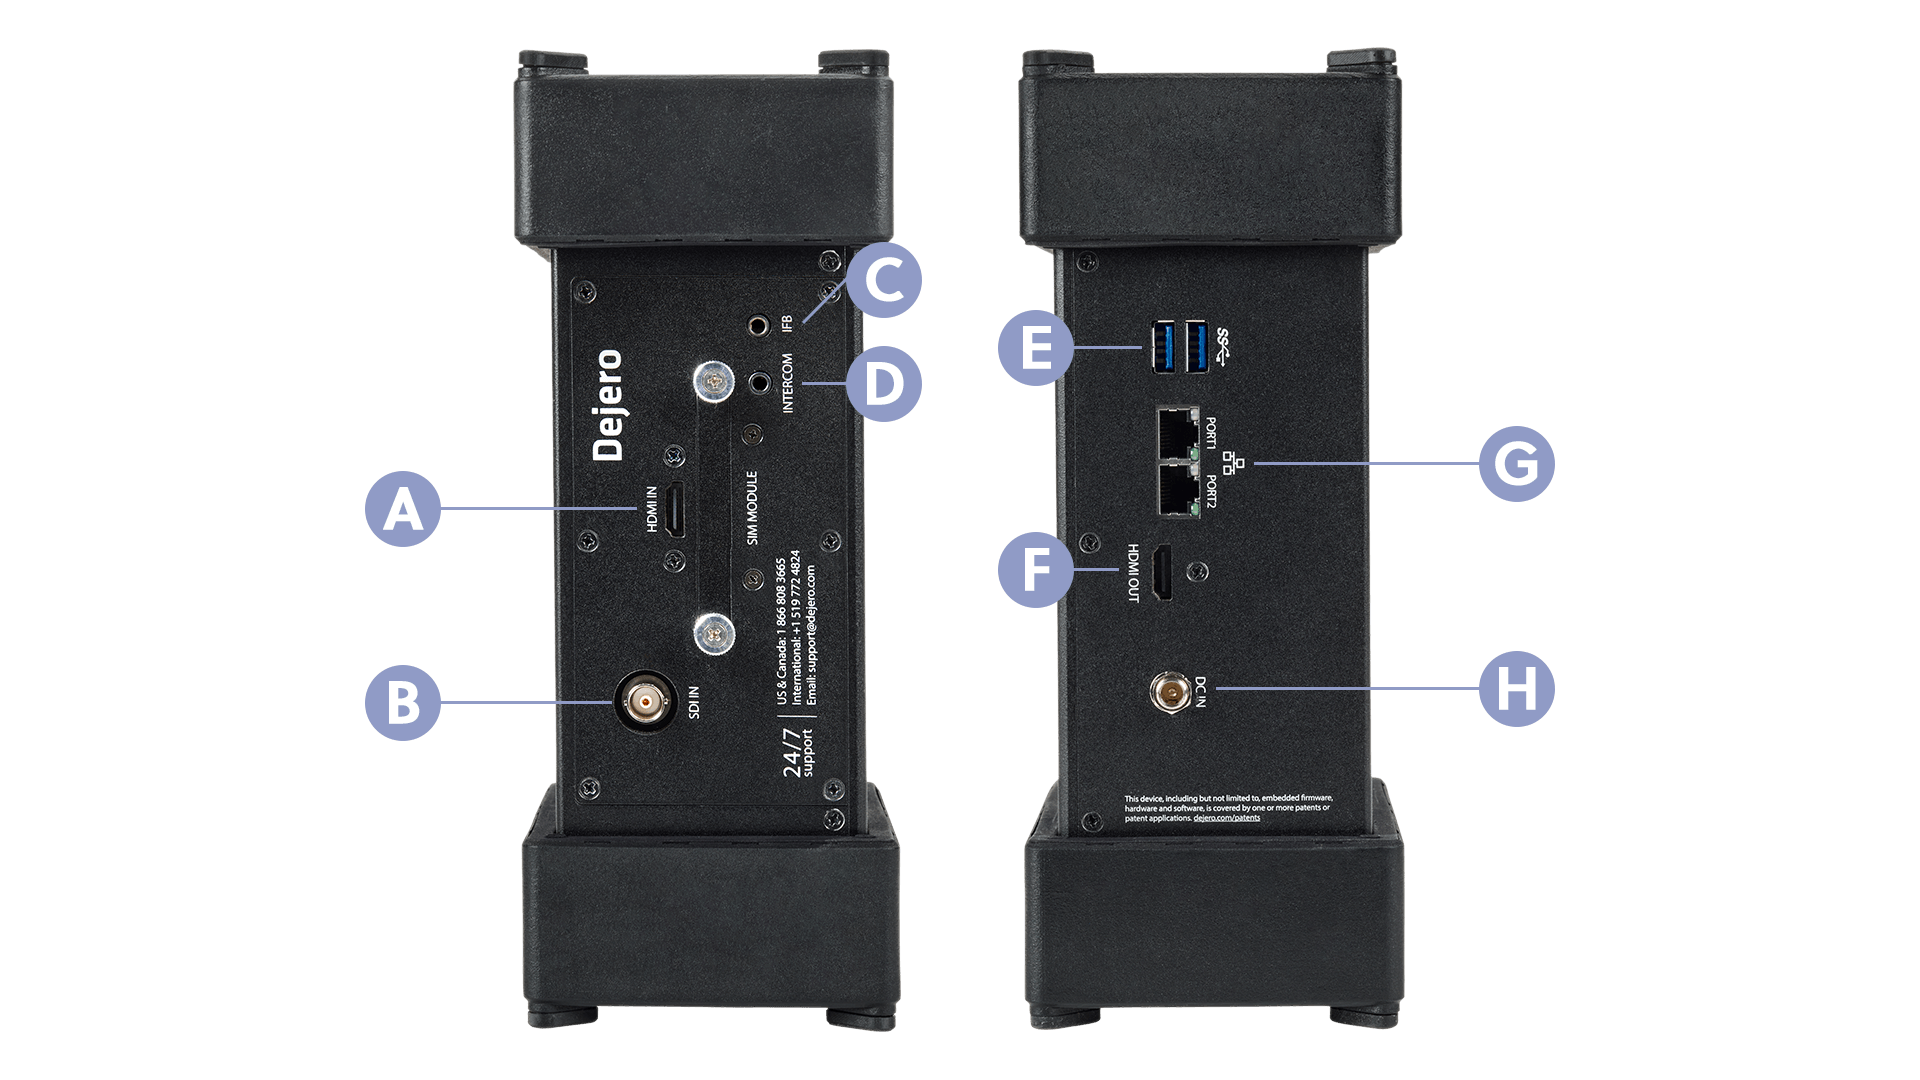
A. HDMI In
B. SDI In
C. IFB Out
D. Intercom
E. USB
F. HDMI Out
G. Ethernet
H. DC In
About the Preview screen
When the EnGo is on, the Preview screen appears. You can use the Preview screen in portrait or landscape mode.
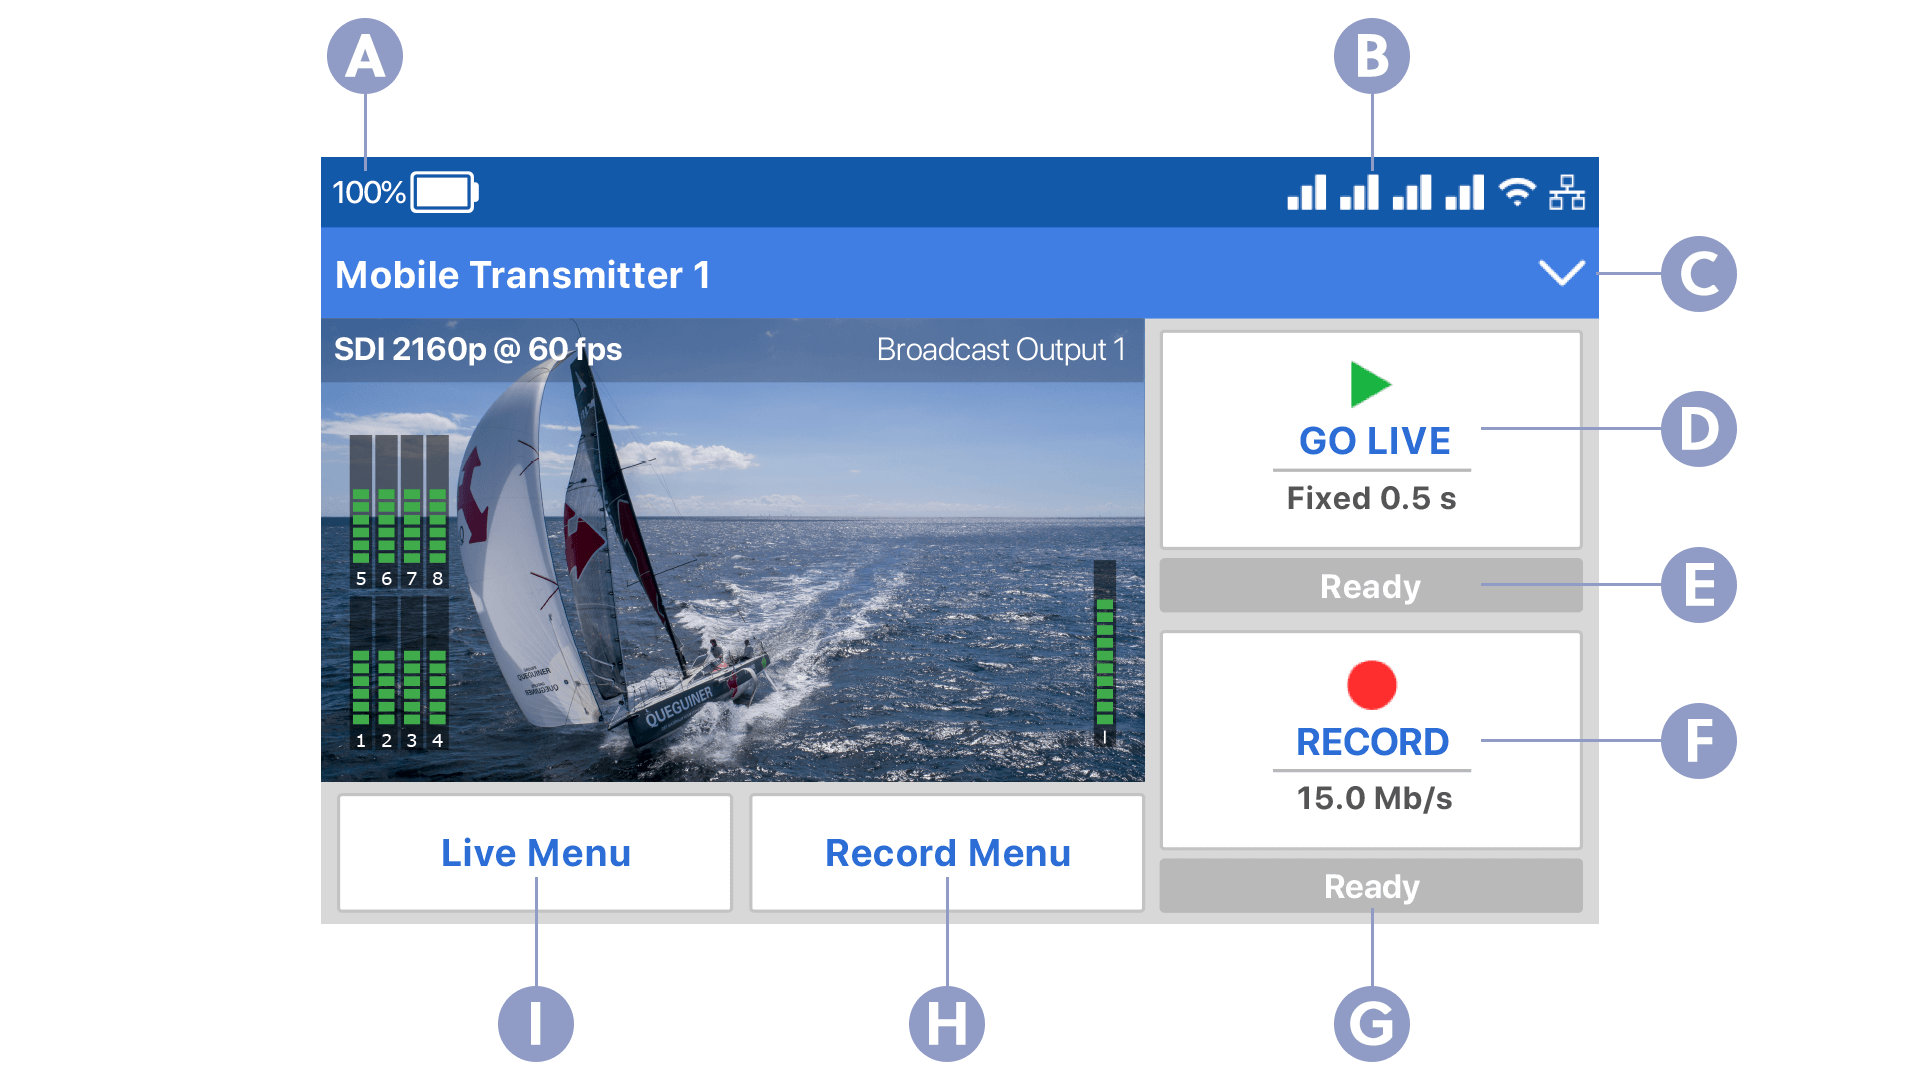
A. Power source
B. Network connections
C. Menu
D. Go Live button
E. Status
F. Record button
G. Status
H. Record menu
I. Live menu
Need help?
You can find more support information on the SupportHub at support.dejero.com. If you require additional help, please contact support at support@dejero.com.
Technical Support:
support@dejero.com
US & Canada (Toll Free): 1 866 808 3665, ext 2
International: +1 519 772 4824, ext 2