Get TITAN Command mounted, powered and online. For safety notes, the status light, every port and full specifications, see the TITAN Command User Guide.
Watch: TITAN Command overview. Step-by-step training videos are coming soon.
From box to online in six steps
- Insert SIM cards
- Mount the device
- Connect GPS
- Connect power
- Connect WAN and LAN
- Configure in Dejero Control
What’s in the box
- TITAN Command device
- DC power input connector
- DIO connector
- Mounting bracket
- 6 × M4 × 6 mm screws
- QR code for this guide
You’ll also need: nano SIM cards (industrial-grade recommended), 4 × M6 screws to fix the bracket, and an external GPS/GNSS antenna if you need location data. The cellular and Wi-Fi antennas are built in.
Ports at a glance
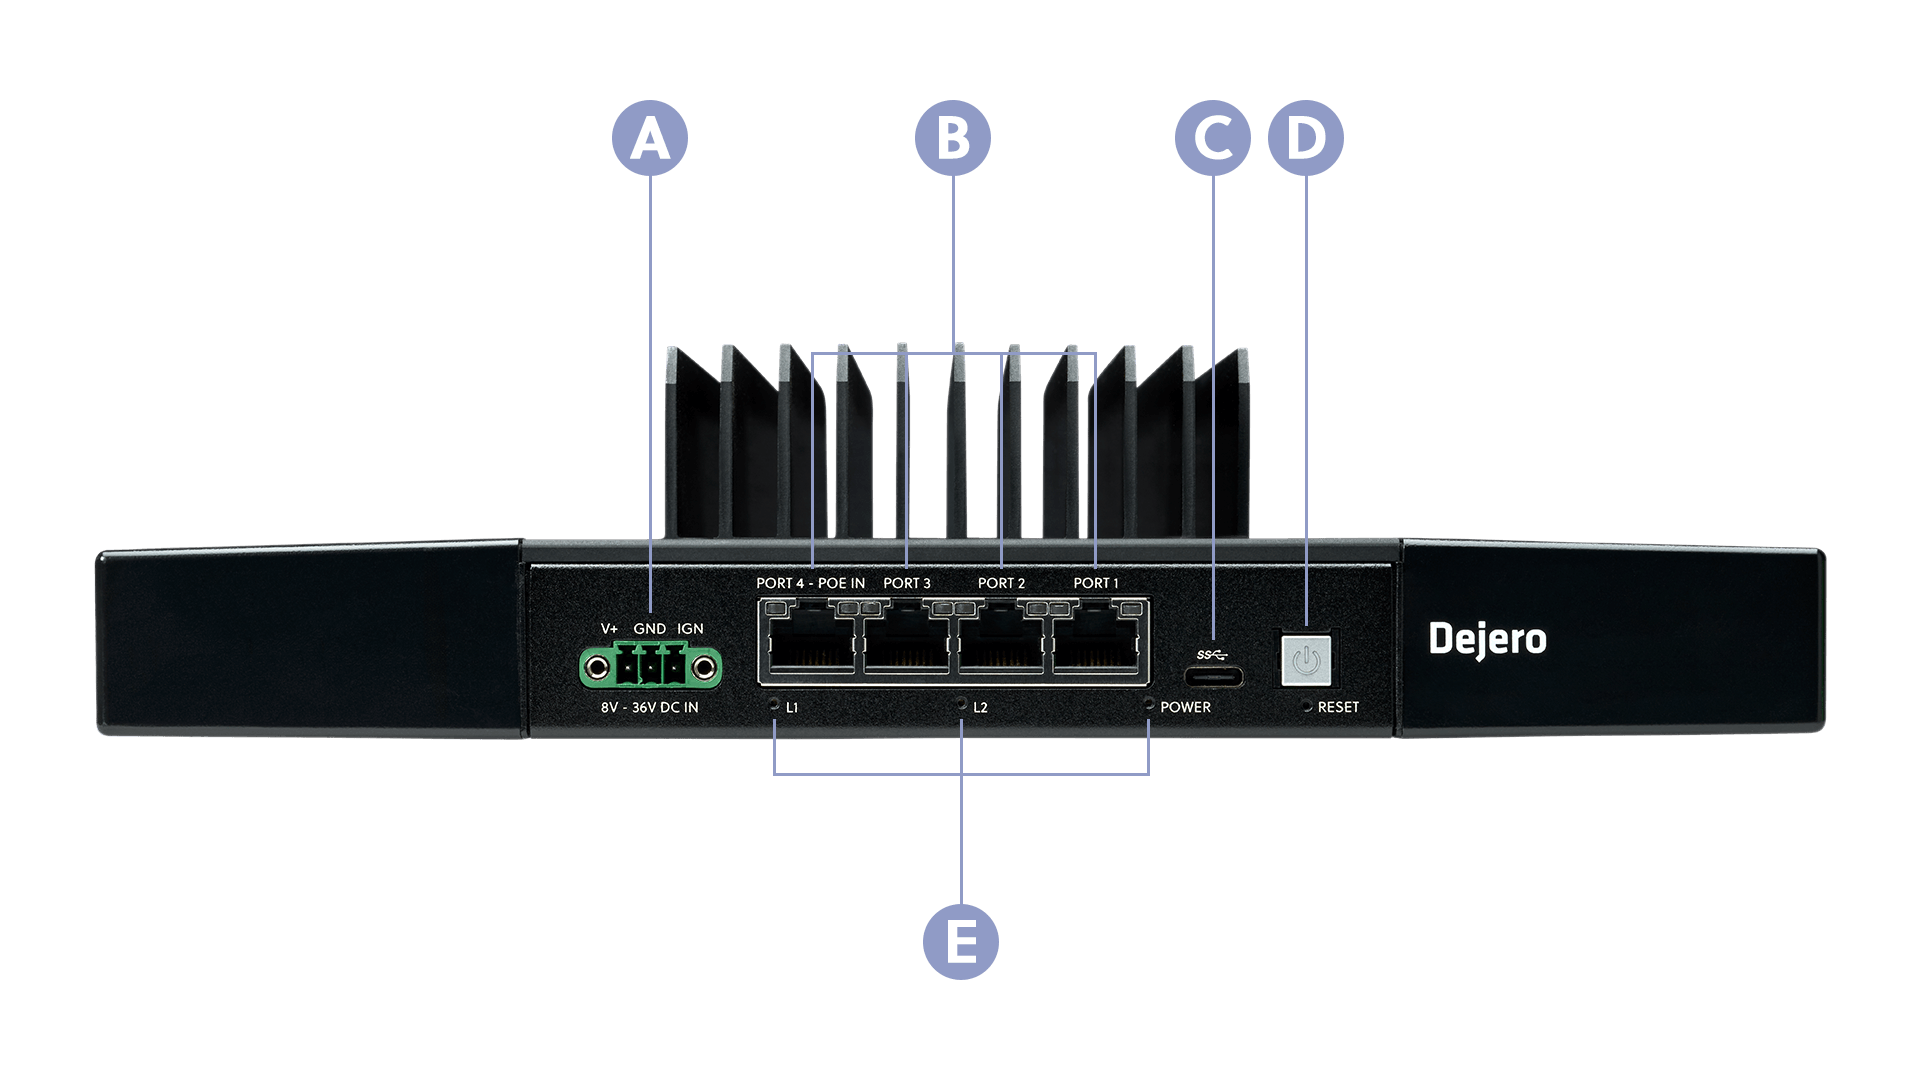
| Front | What it does |
|---|---|
| A · DC power | With optional IGN input |
| B · Ethernet 1–4 | 2.5 GbE. Ports 1–3 WAN, Port 4 LAN and PoE++ |
| C · USB-C | Local interface |
| D · Power button | On, off and reboot |
| E · LEDs | L1 status, L2 reserved, Power |
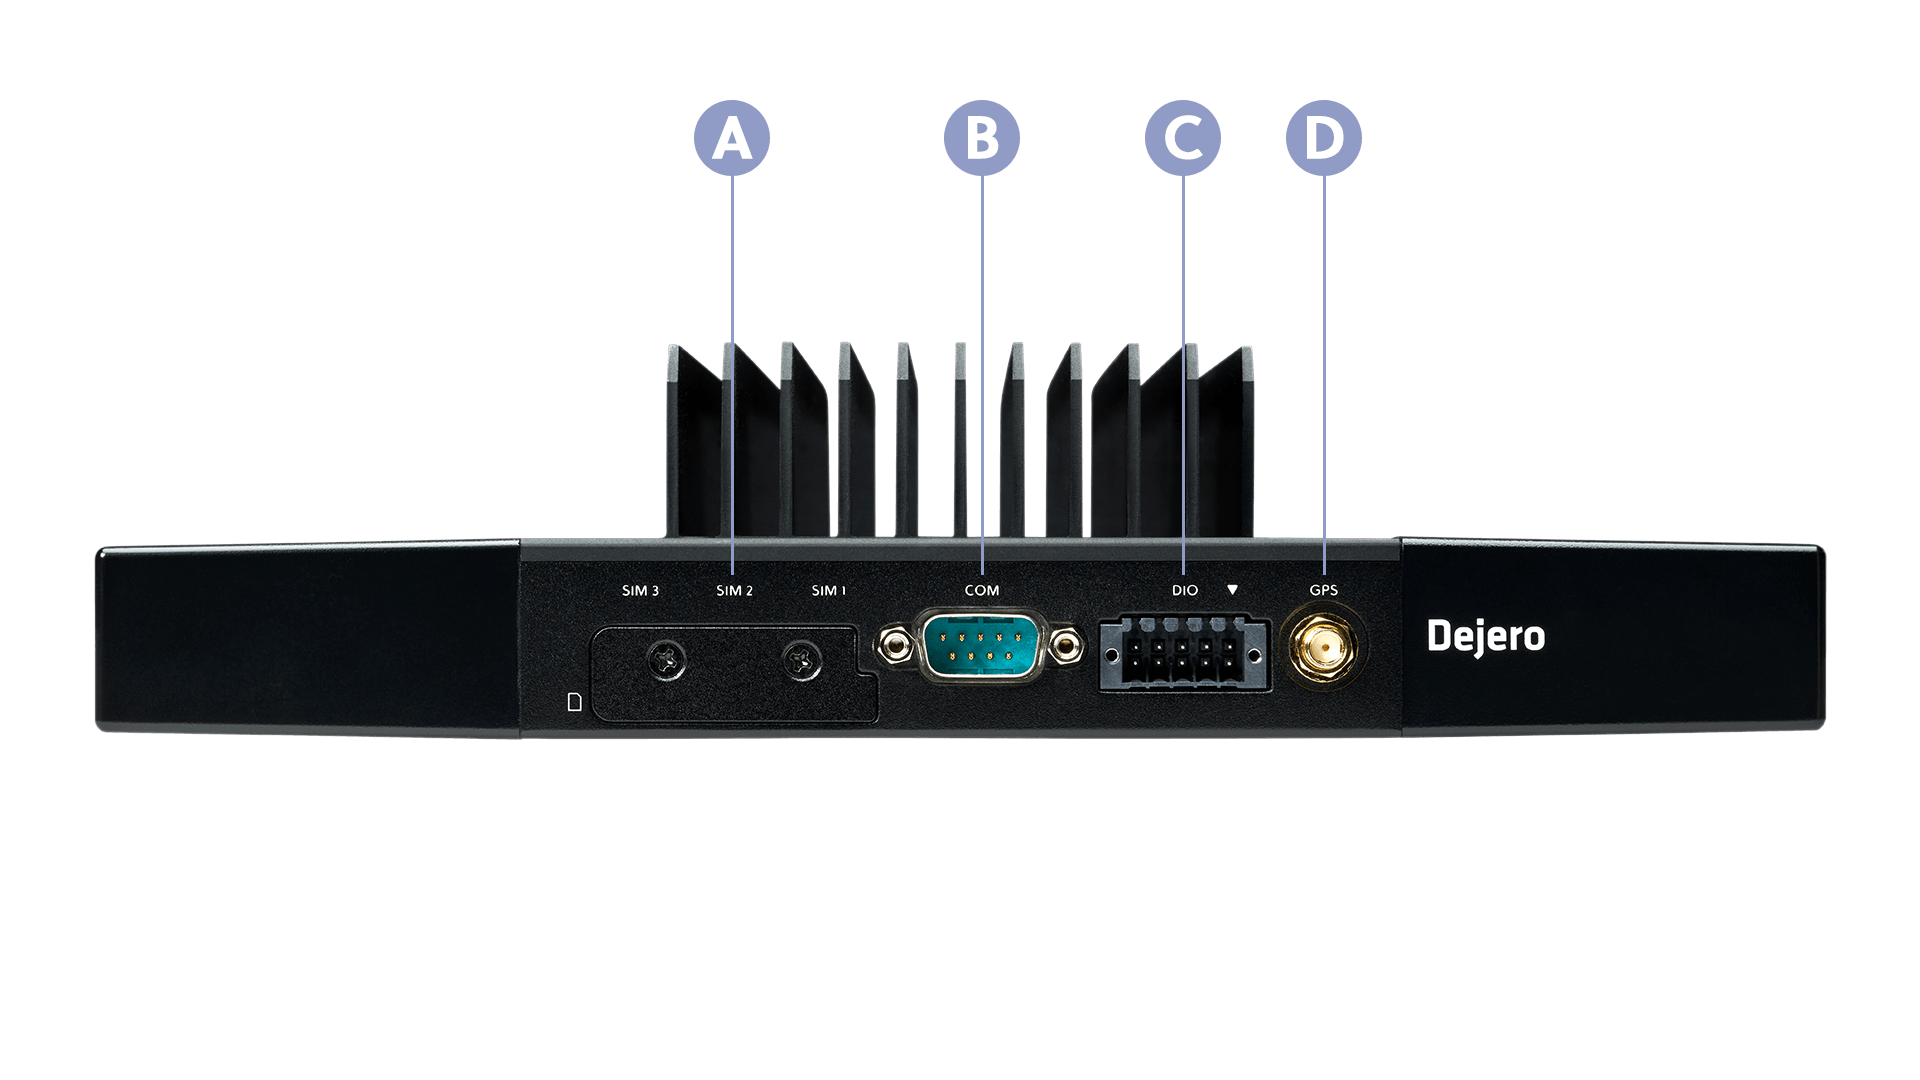
| Back | What it does |
|---|---|
| A · SIM cover | Nano SIM slots |
| B · Serial (COM) | Serial connection |
| C · DIO | Digital input and output |
| D · GPS | SMA antenna port |
Insert SIM cards
Skip this if your unit came with Dejero data services installed.
- Make sure the device is powered off.
- Remove the SIM card cover.
- Insert nano SIM cards (4FF) into the slots.
- Reattach the cover.
Mount the device
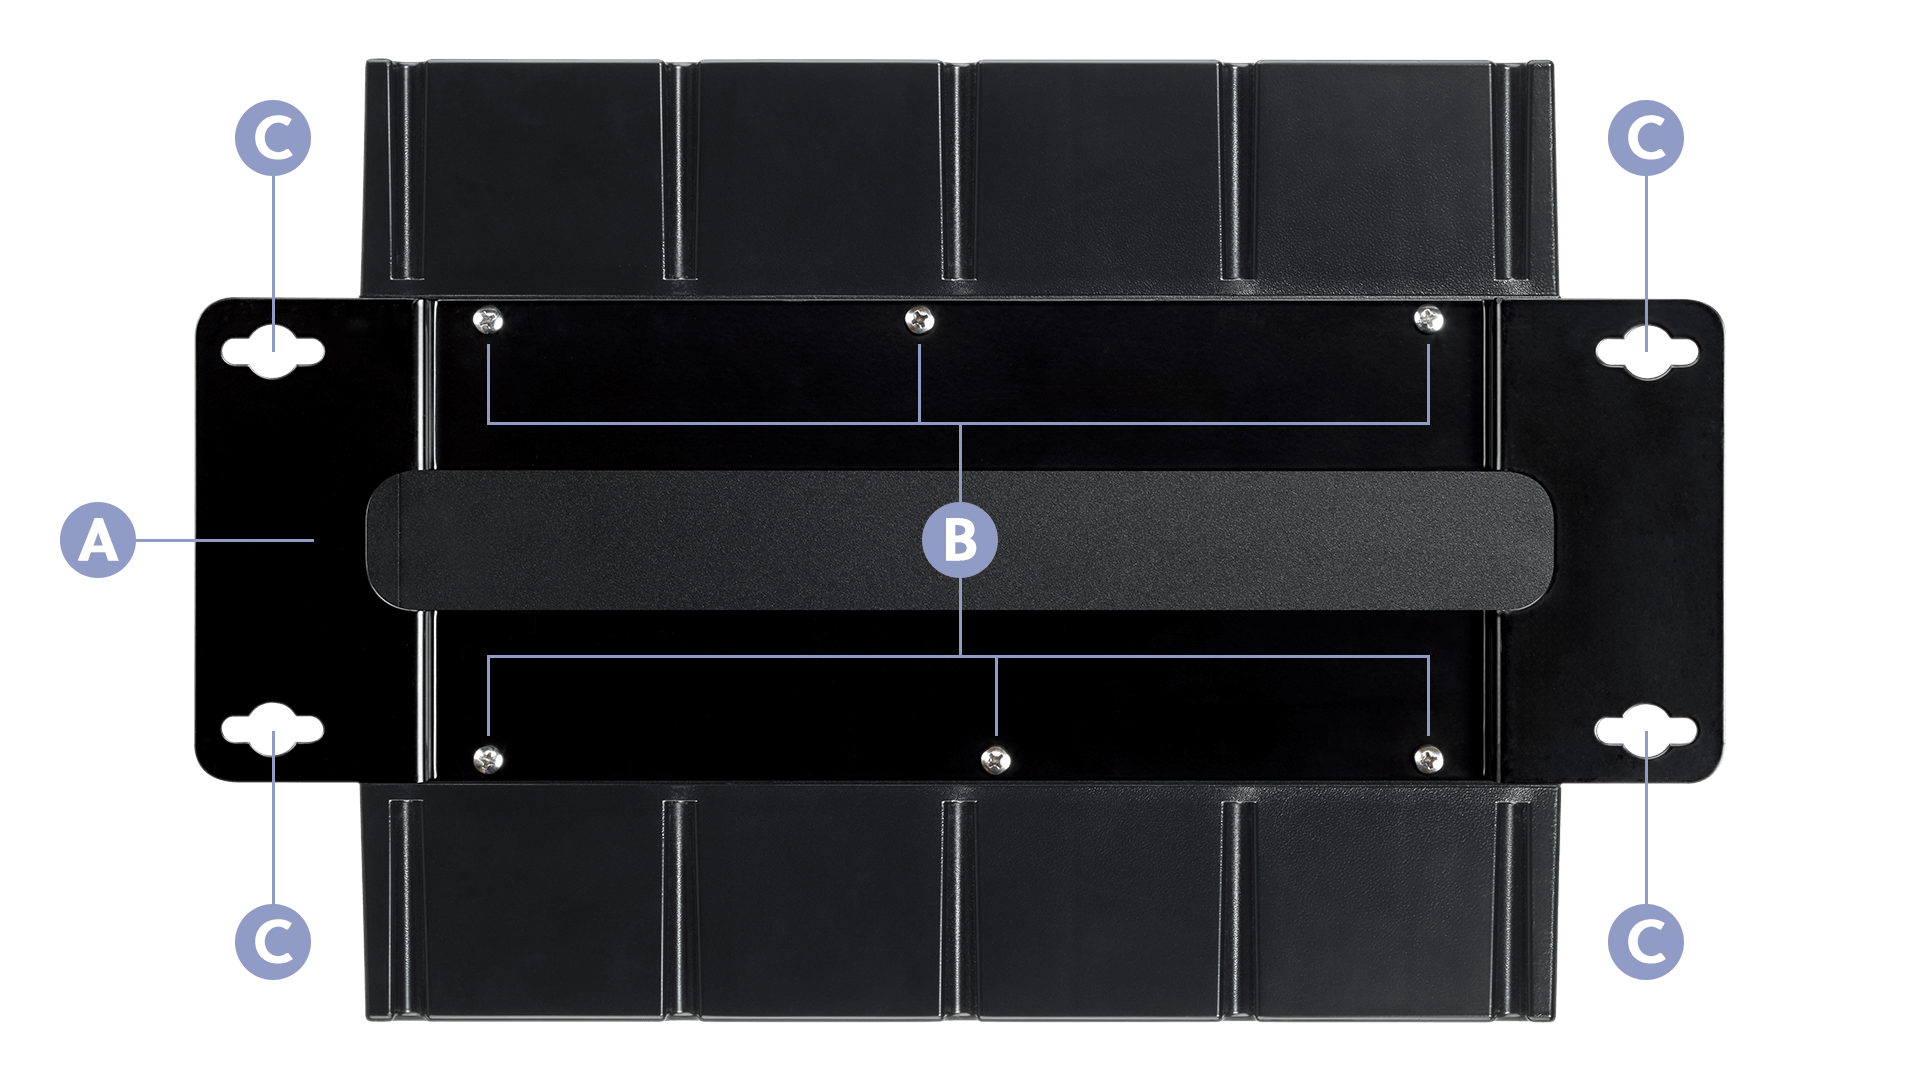
- Align the mounting bracket on the bottom of the device with the installation location.
- Attach the bracket to the device with the supplied M4 × 6 mm screws.
- Fix the bracket to the surface with four M6 screws, then tighten all screws.
Connect GPS
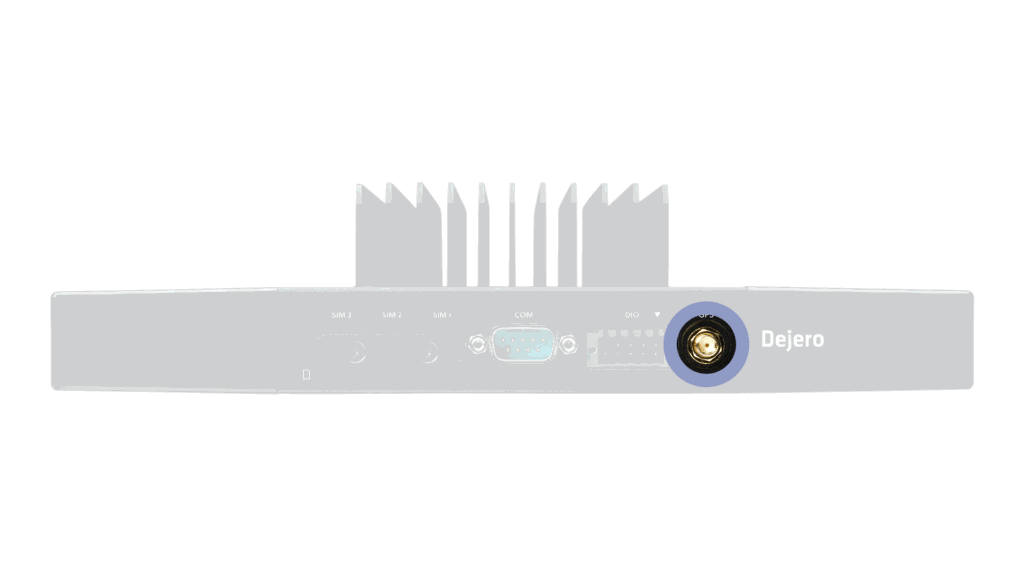
Screw the external GPS antenna to the SMA connector on the back. Tighten the connector on the RF cable, not the hex lock nut on the chassis. Follow the antenna maker’s instructions.
- Untethered dead reckoning (UDR): place the antenna near the device.
- Automotive dead reckoning (ADR): place the device and the antenna near the wheel supplying speed pulses.
Connect power
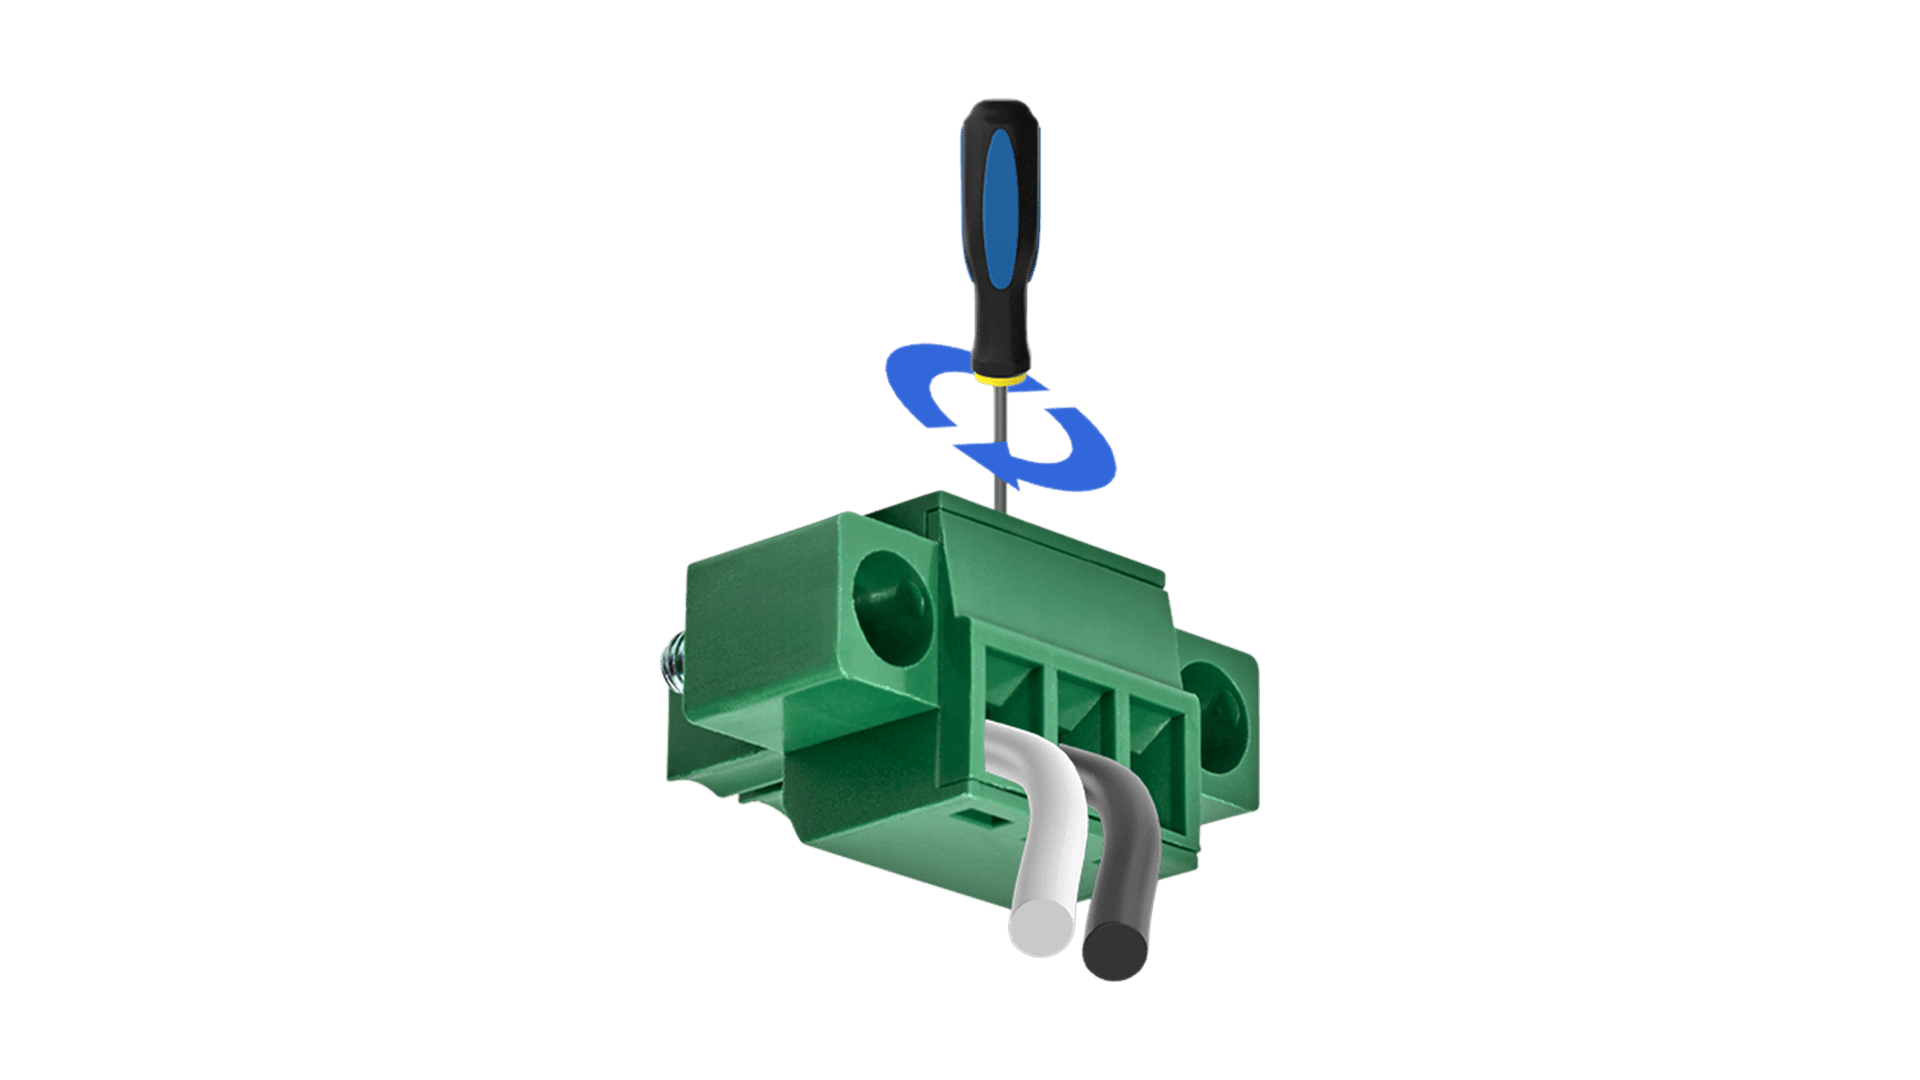
- Insert the wires into the power connector and tighten the clamping screws: Pin 1 (left) V+ 8–36 VDC, Pin 2 (middle) GND, Pin 3 (right) IGN, optional, for a vehicle ignition signal.
- Plug the connector into the DC power port (A) on the front and tighten its screws with a flat-head screwdriver.
Or use PoE++: power the device through Ethernet Port 4.
Connect WAN and LAN
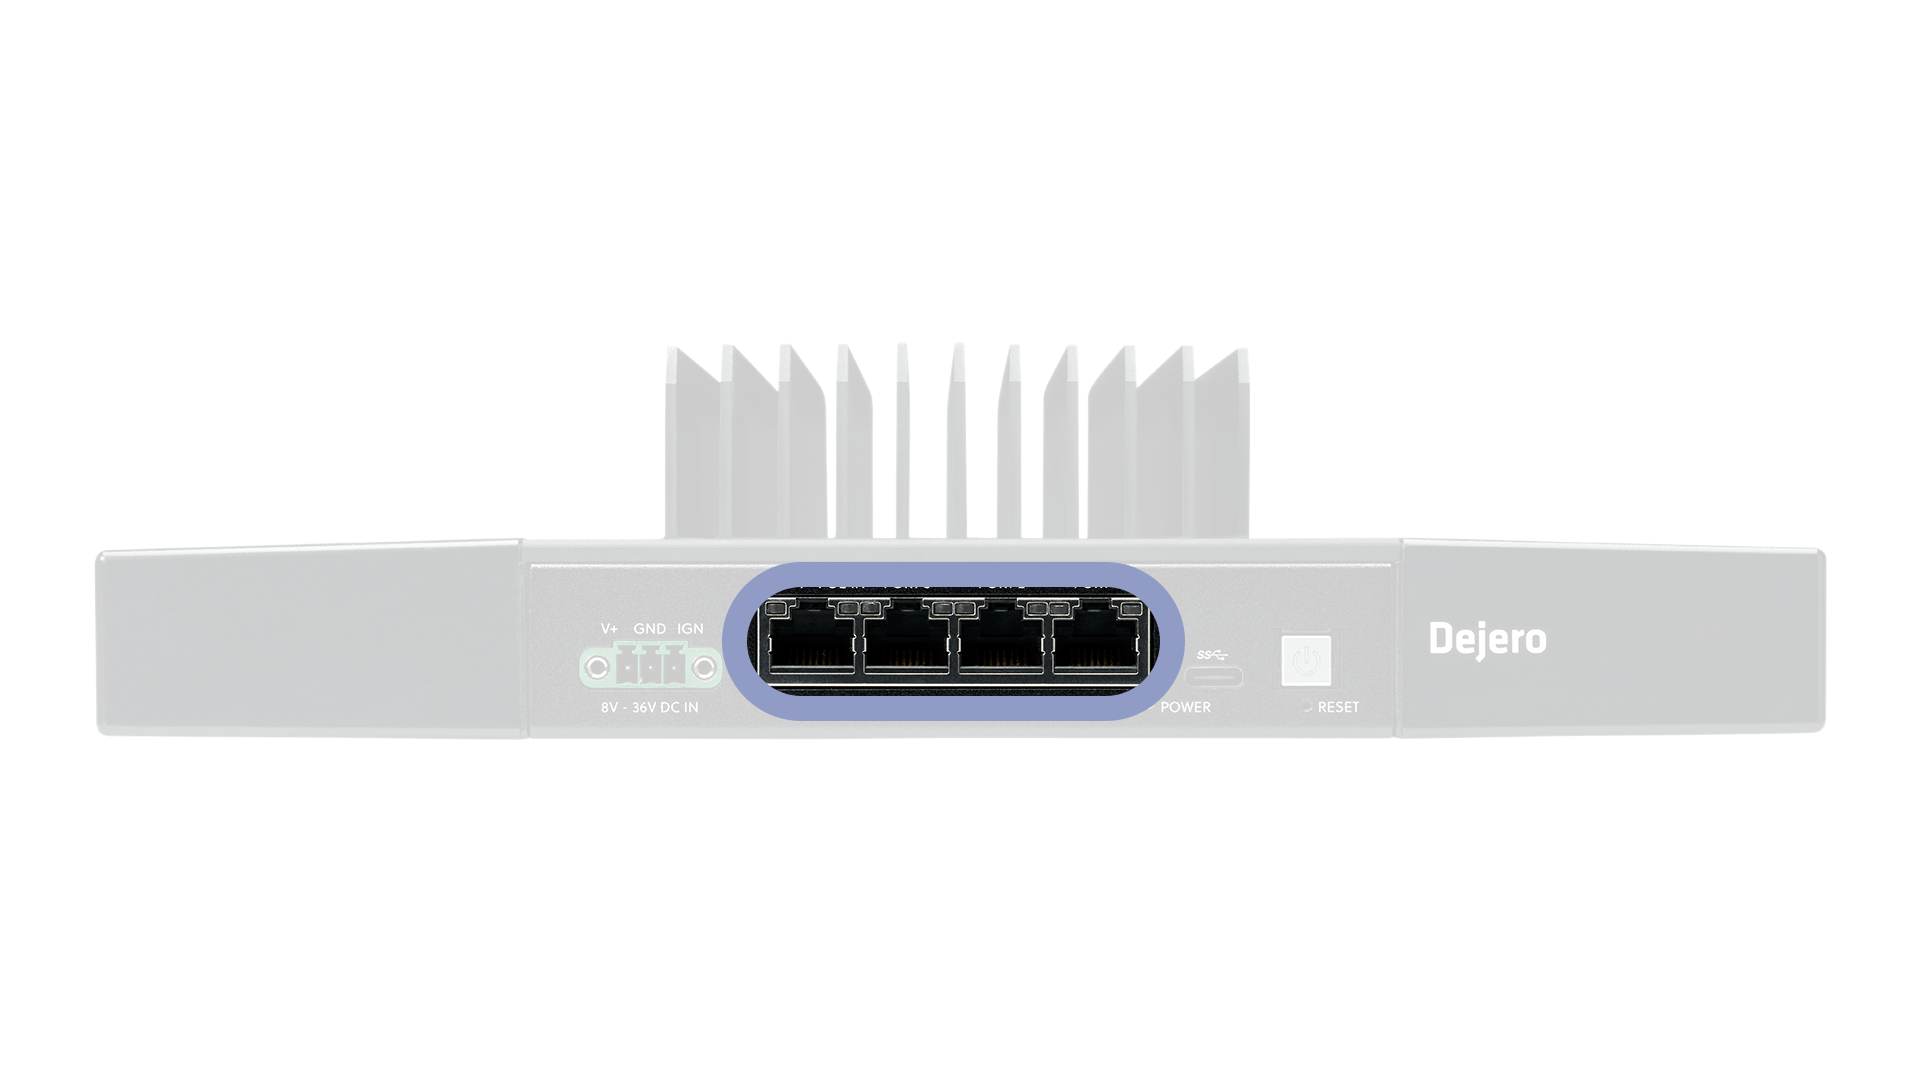
- WAN — Ports 1, 2 or 3: internet connections.
- LAN — Port 4: your local devices.
- DIO (optional): fit ferrules to the wires, then press the orange plunger with a small screwdriver to insert them. The plunger stays low with a wire in place.
Power on and check the light
| To | Hold the power button |
|---|---|
| Power on or off | At least 2 seconds |
| Reboot | At least 10 seconds |
TITAN Command starts automatically when power is applied. The Power LED glows green when it’s on. L1 shows the same status as Dejero Control:
| L1 light | State | Meaning |
|---|---|---|
| Off | Initializing | Not yet connected to Control |
| Blinking green | Connecting | Trying to reach Control |
| Solid green | Connected | Connected and working |
| Blinking red | Disconnected | Connected, but there’s an issue with the concentrator. Contact Dejero Support. |
| Solid red | Error | Connected, but not working. Contact Dejero Support. |
L2 is reserved for future use.
Configure in Dejero Control
- Go to control.dejero.com. You need administrator permissions.
- Sign in with your email and password.
- Configure the device remotely.
New to Control? Read the Dejero Control guide.
Get help
Visit support.dejero.com, email support@dejero.com, or call ext. 2, 24 hours a day: 1 866 808 3665 (US and Canada) or +1 519 772 4824 (international).
More guides: TITAN Command User Guide · TITAN Mobile Quick Start · TITAN Mobile User Guide · TITAN Scout User Guide · TITAN Ghost Getting Started · Dejero Control · All user guides